Database phần I - Cài đặt, sử dụng nhanh
1. Cấu hình MySQL
Để kết nối với cơ sở dữ liệu MySQL từ Spring Boot, đảm bảo rằng MySQL đã được cài đặt và hoạt động bình thường.
Khởi động MySQL Workbench và kết nối vào local database. Sau đó mở phần server status

Ở đây MySQL đang hoạt động ở cổng 3306.
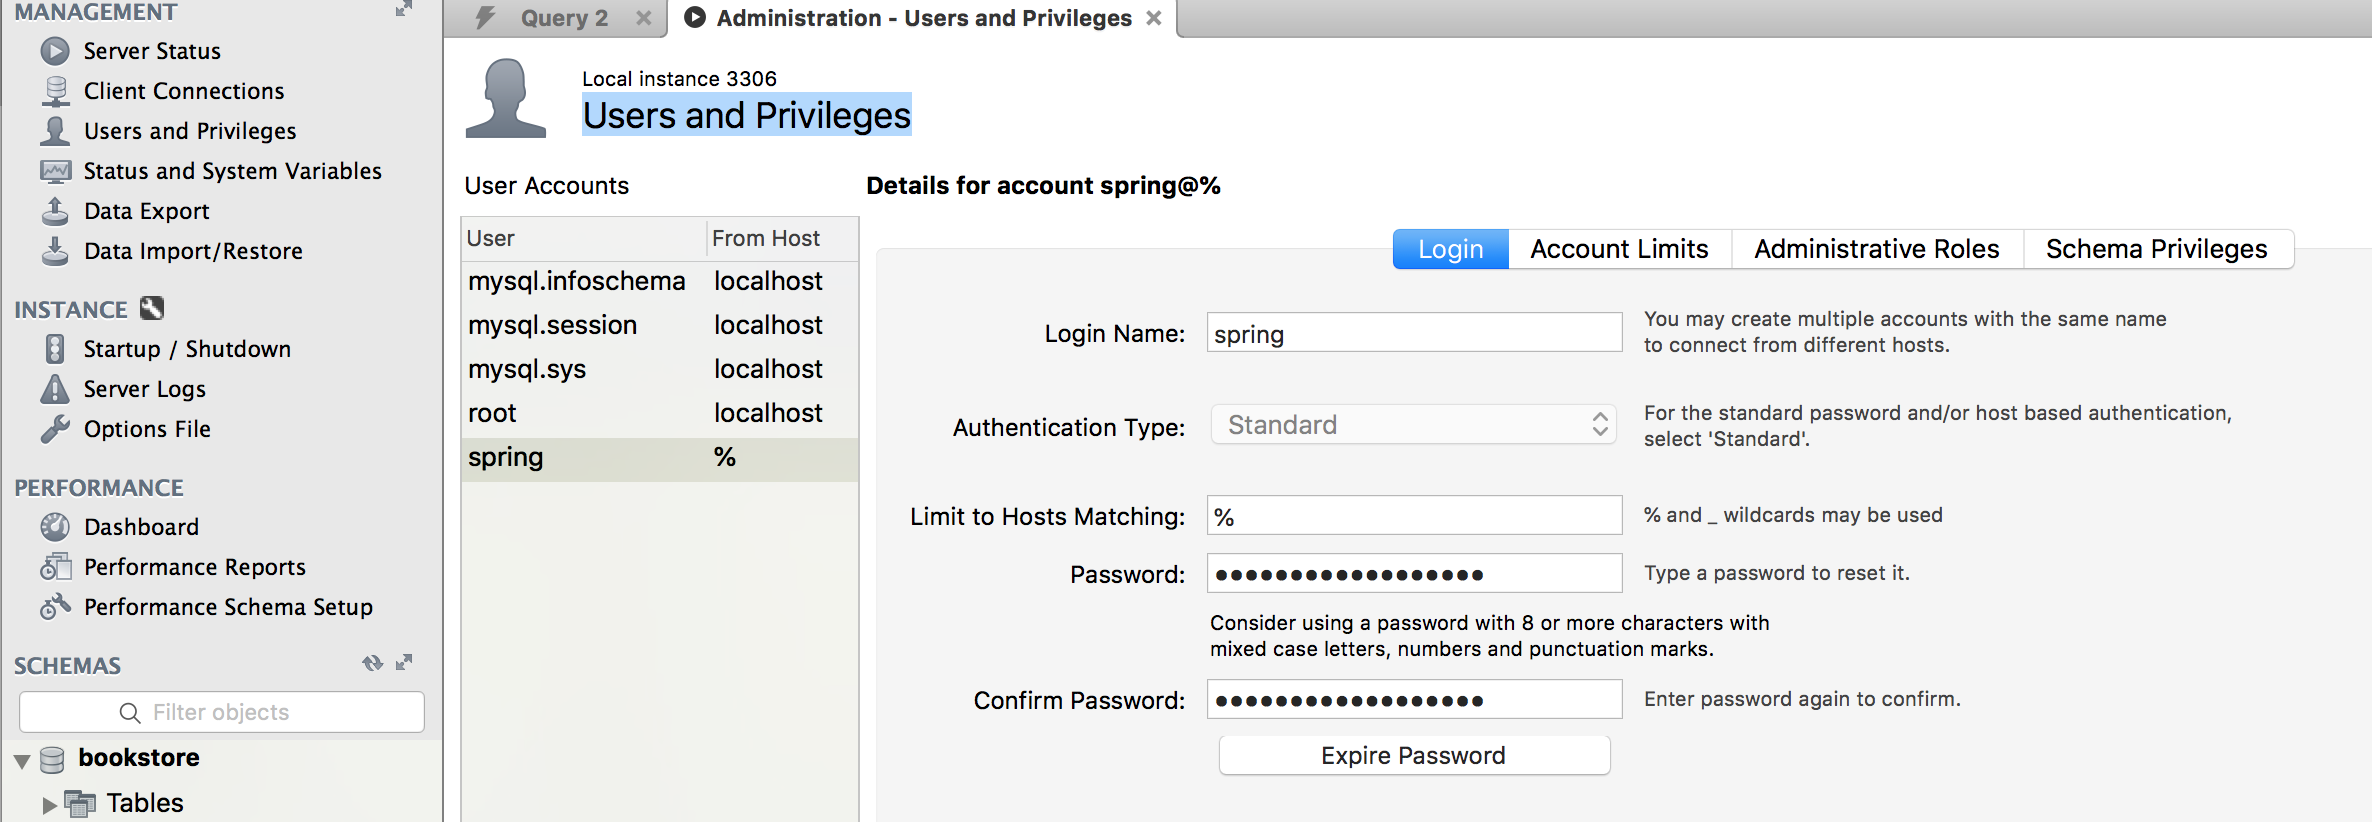
Sau đó vào phần Users and Privileges, tạo một user mới có tên là spring và mật khẩu có thể là spring123
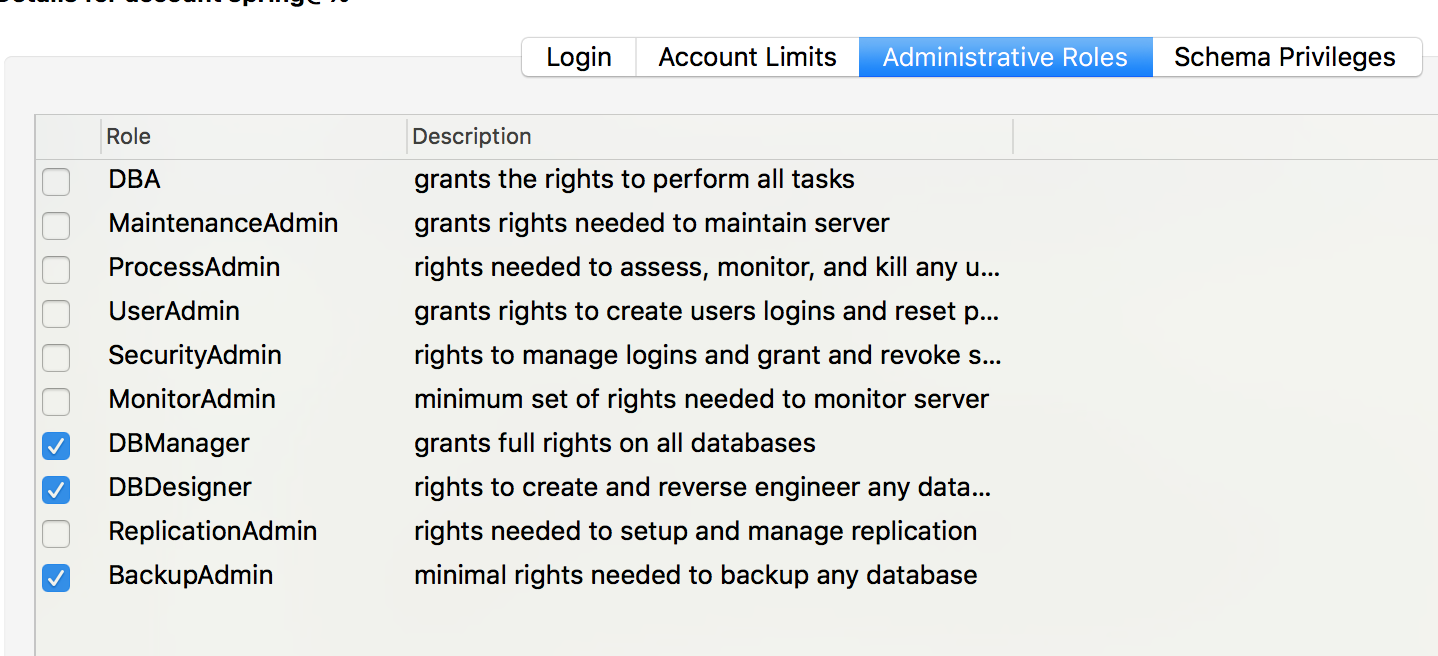
Trong mục Administrative Roles tick chọn như dưới
Xong tất cả, bấm Apply.
2. Tạo Database
Trong MySQL Workbench, ở phần Schema, chọn Create Schema
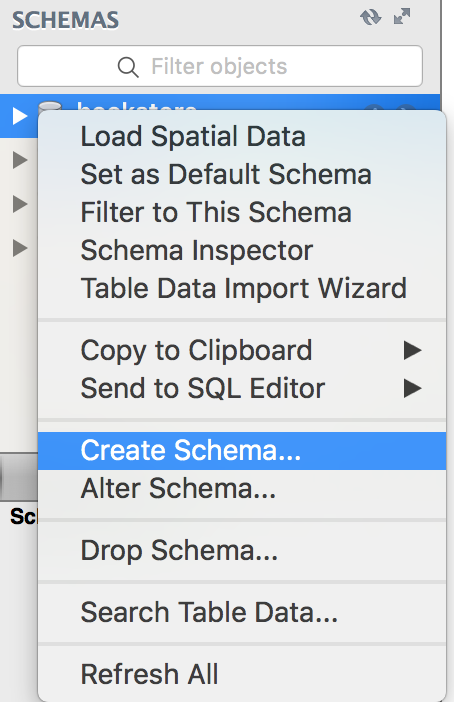
Nhập tên database (schema) là bookstore rồi apply.
3. Kết nối MySQL từ Spring
Cấu hình dự án
Mở file application.properties và thay đổi nội dung thành
spring.jpa.hibernate.ddl-auto=update
spring.datasource.url=jdbc:mysql://localhost:<port>/bookstore
spring.datasource.username=spring
spring.datasource.password=spring123
Thêm dependency vào file pom.xml và hoàn tất import
<dependency>
	<groupId>org.springframework.boot</groupId>
	<artifactId>spring-boot-starter-data-jpa</artifactId>
</dependency>

<dependency>
	<groupId>mysql</groupId>
	<artifactId>mysql-connector-java</artifactId>
</dependency>
Cập nhật model, thêm repository và tích hợp repository vào controller
Chỉnh sửa file Book.java thành
import lombok.Data;

import javax.persistence.Entity;
import javax.persistence.GeneratedValue;
import javax.persistence.GenerationType;
import javax.persistence.Id;

@Data
@Entity
public class Book {

    @Id
    @GeneratedValue(strategy= GenerationType.AUTO)
    private int id;

    private String name;

    private String author;

    private int year;
}
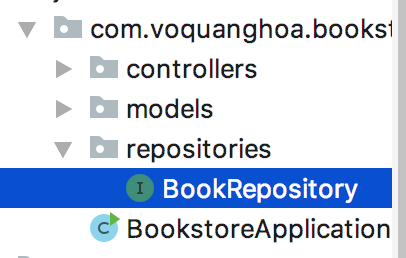
Thêm interface BookRepository vào package repositories
Nội dung
import com.voquanghoa.bookstore.models.Book;
import org.springframework.data.jpa.repository.JpaRepository;

public interface BookRepository extends JpaRepository<Book, Integer> {
}
Cập nhật Controller để tích hợp với repository
import com.voquanghoa.bookstore.models.Book;
import com.voquanghoa.bookstore.repositories.BookRepository;
import org.springframework.beans.factory.annotation.Autowired;
import org.springframework.web.bind.annotation.*;

import java.util.Optional;

@RestController
@RequestMapping("/api/books")
public class BookController {

    @Autowired
    private BookRepository bookRepository;

    @GetMapping("/{id}")
    Optional<Book> get(@PathVariable int id){
        return bookRepository.findById(id);
    }

    @GetMapping
    Iterable<Book> get(){
        return bookRepository.findAll();
    }

    @DeleteMapping("/{id}")
    void delete(@PathVariable int id){
        bookRepository.deleteById(id);
    }

    @PostMapping()
    void post(@RequestBody Book book){
        book.setId(0);
        bookRepository.save(book);
    }

    @PutMapping()
    void put(@RequestBody Book book){
        bookRepository.save(book);
    }
}
Thử nghiệm
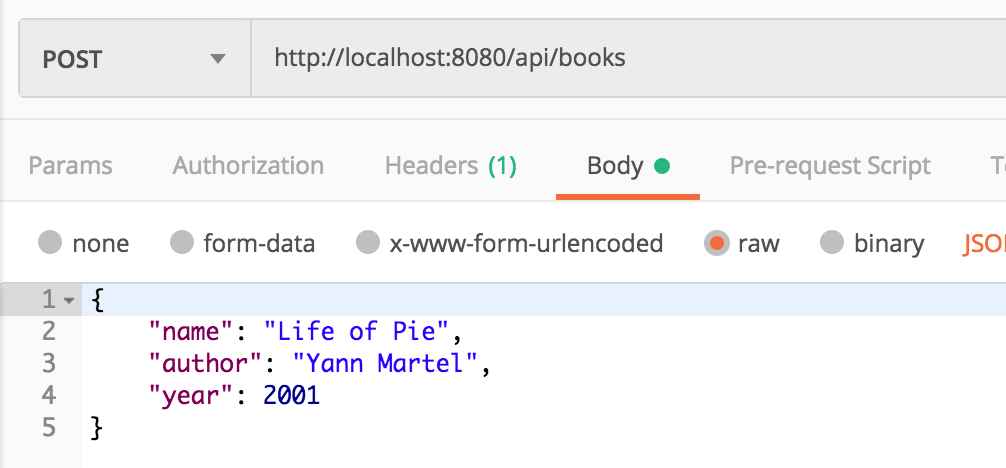
Khởi chạy dịch vụ web, thực hiện các request bằng postman, dữ liệu sẽ được lưu thực sự như thế này

Thêm thao tác vào repository
Trên đây, ta mới chỉ sử dụng các method có sẵn từ interface JpaRepository như save, findById, deleteById, findAll. Ngoài ra ta cũng có thể thêm các phương thức tùy biến khác:
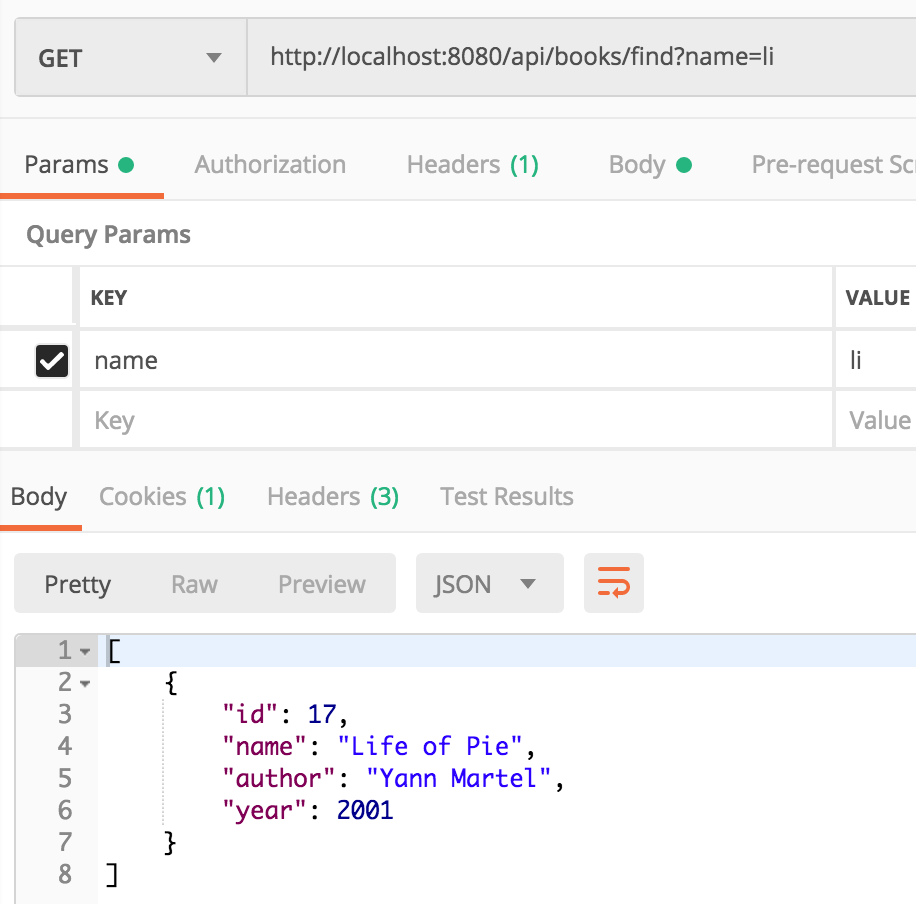
Ví dụ: Tìm kiếm sách với tên
import com.voquanghoa.bookstore.models.Book;
import org.springframework.data.jpa.repository.JpaRepository;

public interface BookRepository extends JpaRepository<Book, Integer> {
    Iterable<Book> findByNameContaining(String pattern);
}
Controller
    @GetMapping("/find")
    Iterable<Book> find(@RequestParam String name){
        return bookRepository.findByNameContaining(name);
    }
Kết quả
4. Câu hỏi và bài tập
- Chỉ thị @Id và @GeneratedValue có ý nghĩa gì trong ví dụ trên
- Trong phần
extends JpaRepository<Book, Integer>thìIntegerlà gì, tại sao ở đây làInteger - JpaRepository và BookRepository là gì và nó có ý nghĩa gì trong ứng dụng
- Thực hiện implement Model, Repository và Controller cho Category, Publisher
Xem